 YNSPIRA
Copilot Notebooks: better than you think, as long as you avoid the classic mistakes


A short intro to the tool and 5 decisions to make when setting up your notebook.
Copilot Notebooks is easy to fall for, as long as you use it the right way (and trust me, I rarely say that about Microsoft Copilot).
A lot of people try Copilot Notebooks for the first time and use it badly. They stuff a notebook with low-quality sources, skip the instructions field, or mix several projects into the same notebook. Then they decide the tool wasn't worth their time.
This guide is meant to show you how to use it properly so you actually get value out of it and don't miss what it can do.
I'll start with a short, practical intro to the most important features in Copilot Notebooks. Then I'll walk through 5 decisions you should make when setting up a notebook. At the end, I sum up the most common mistakes to avoid.
What is Copilot Notebooks and how is it built?
Microsoft describes the tool as "an AI-powered workspace where you can collect content and sources so Copilot can understand the full picture and give you more relevant, context-aware answers."
Consider creating a notebook when you or your team will be working on a topic, a project, or a subject area over a longer period. Copilot Notebooks is especially useful if you want to go deeper into the sources, spot connections or patterns you haven't seen before, or simply want Copilot Chat to answer based only on the sources you've added.
Heads up: Copilot Notebooks does not yet support external sharing. You can only share a notebook with people in your own organization.
Where do you find Copilot Notebooks?
You'll find it in:
- Copilot in the browser at m365.cloud.microsoft
- The Copilot desktop app. IMPORTANT! Microsoft is gradually rolling out an updated Copilot experience. Your interface may look different depending on whether you're on the old version or the new one.
Variant A: How to get to Notebooks in the old version:
- Look for "Notebooks" in the left-hand menu in Copilot.
- Click the "+" symbol to create a new notebook.
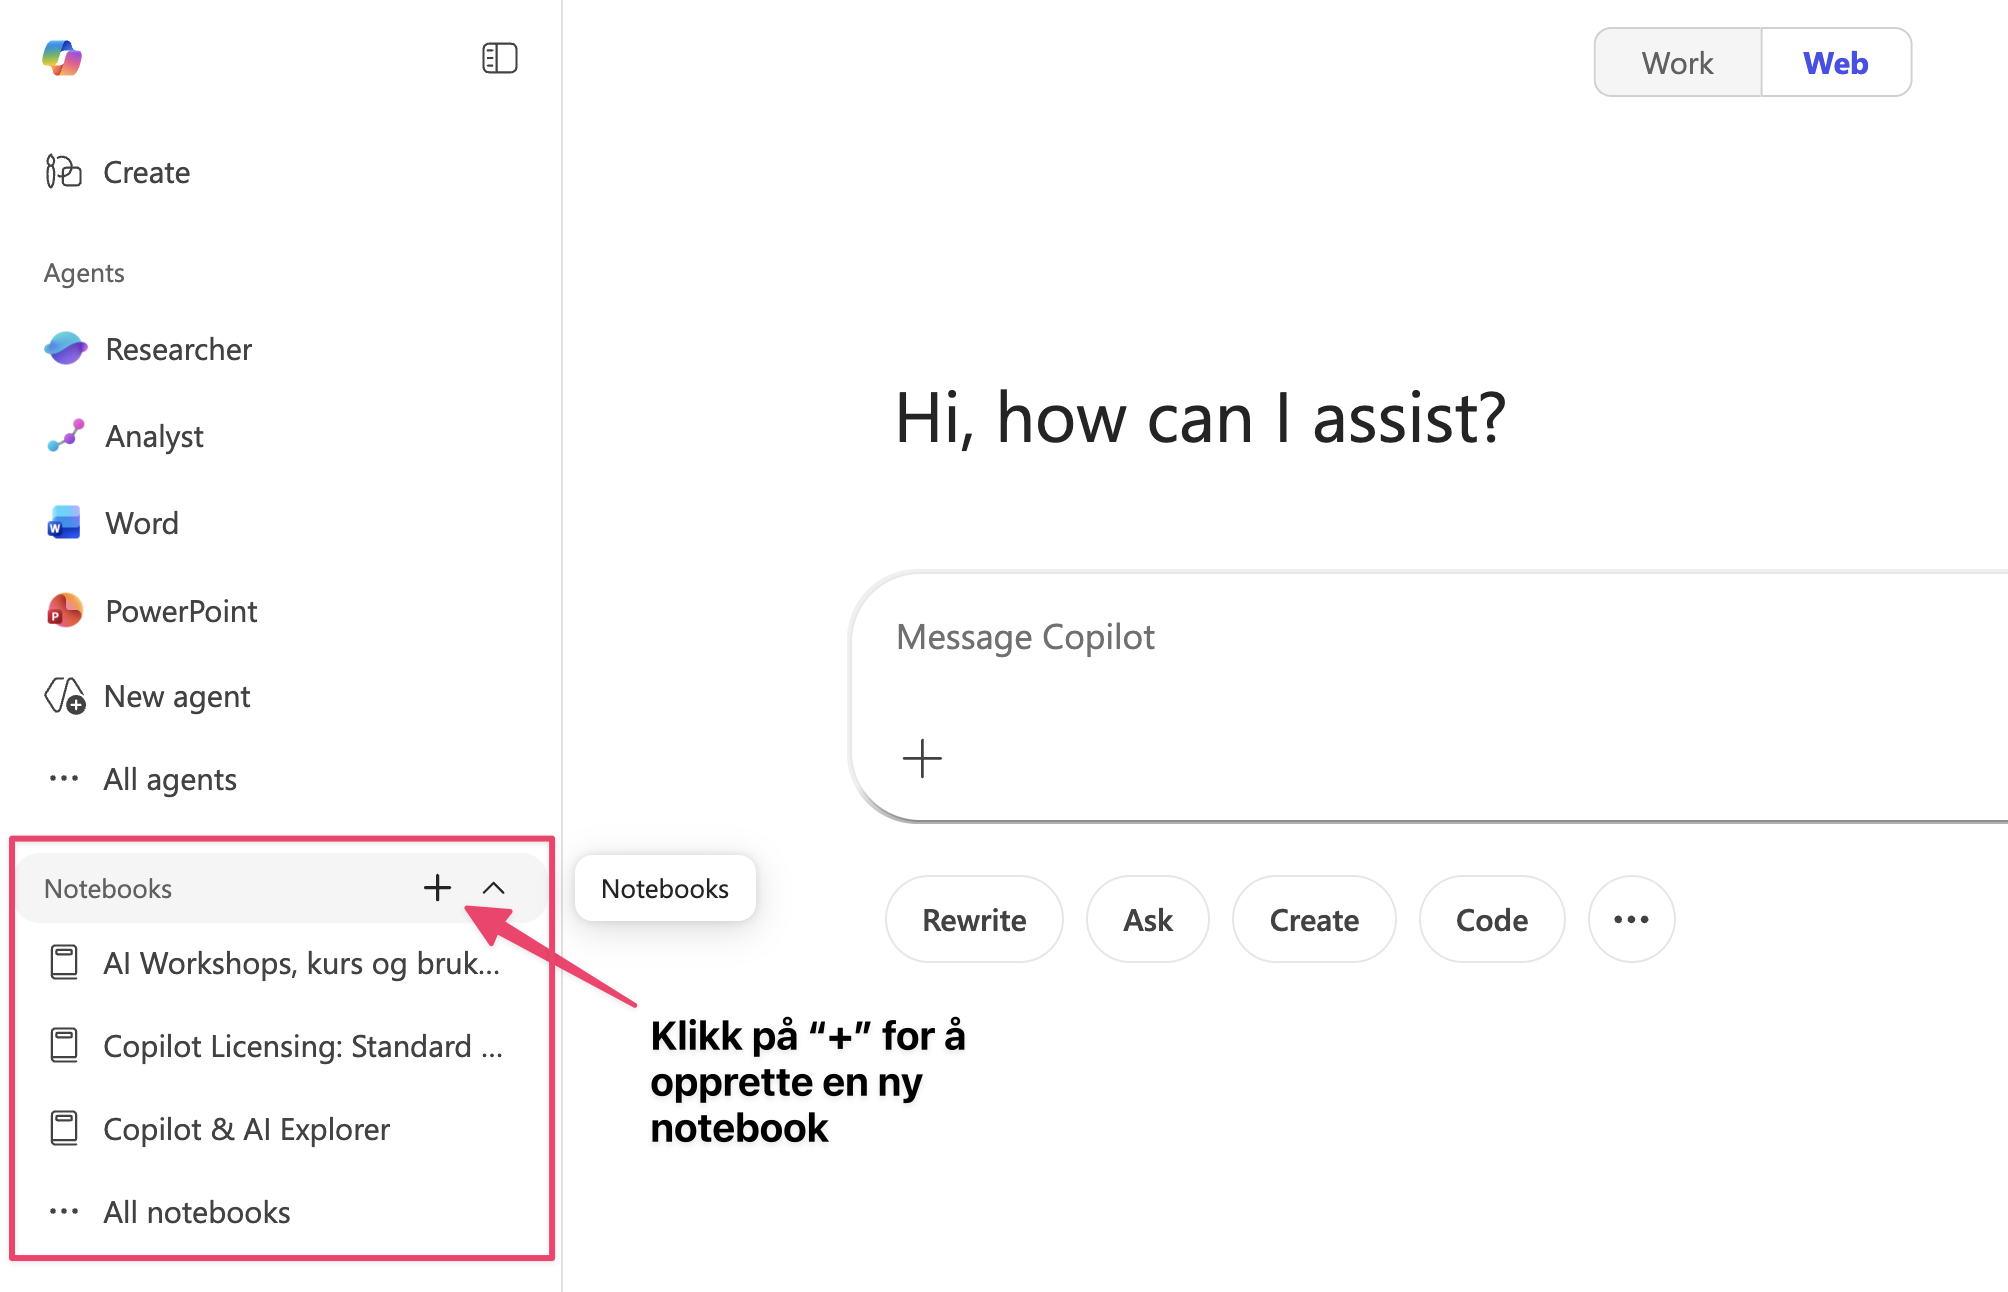
Variant B: How to get to Notebooks in the new version:
- Click the "waffle menu" in the top left, then "Notebooks".
- Click "+ New notebook" to create a new notebook.
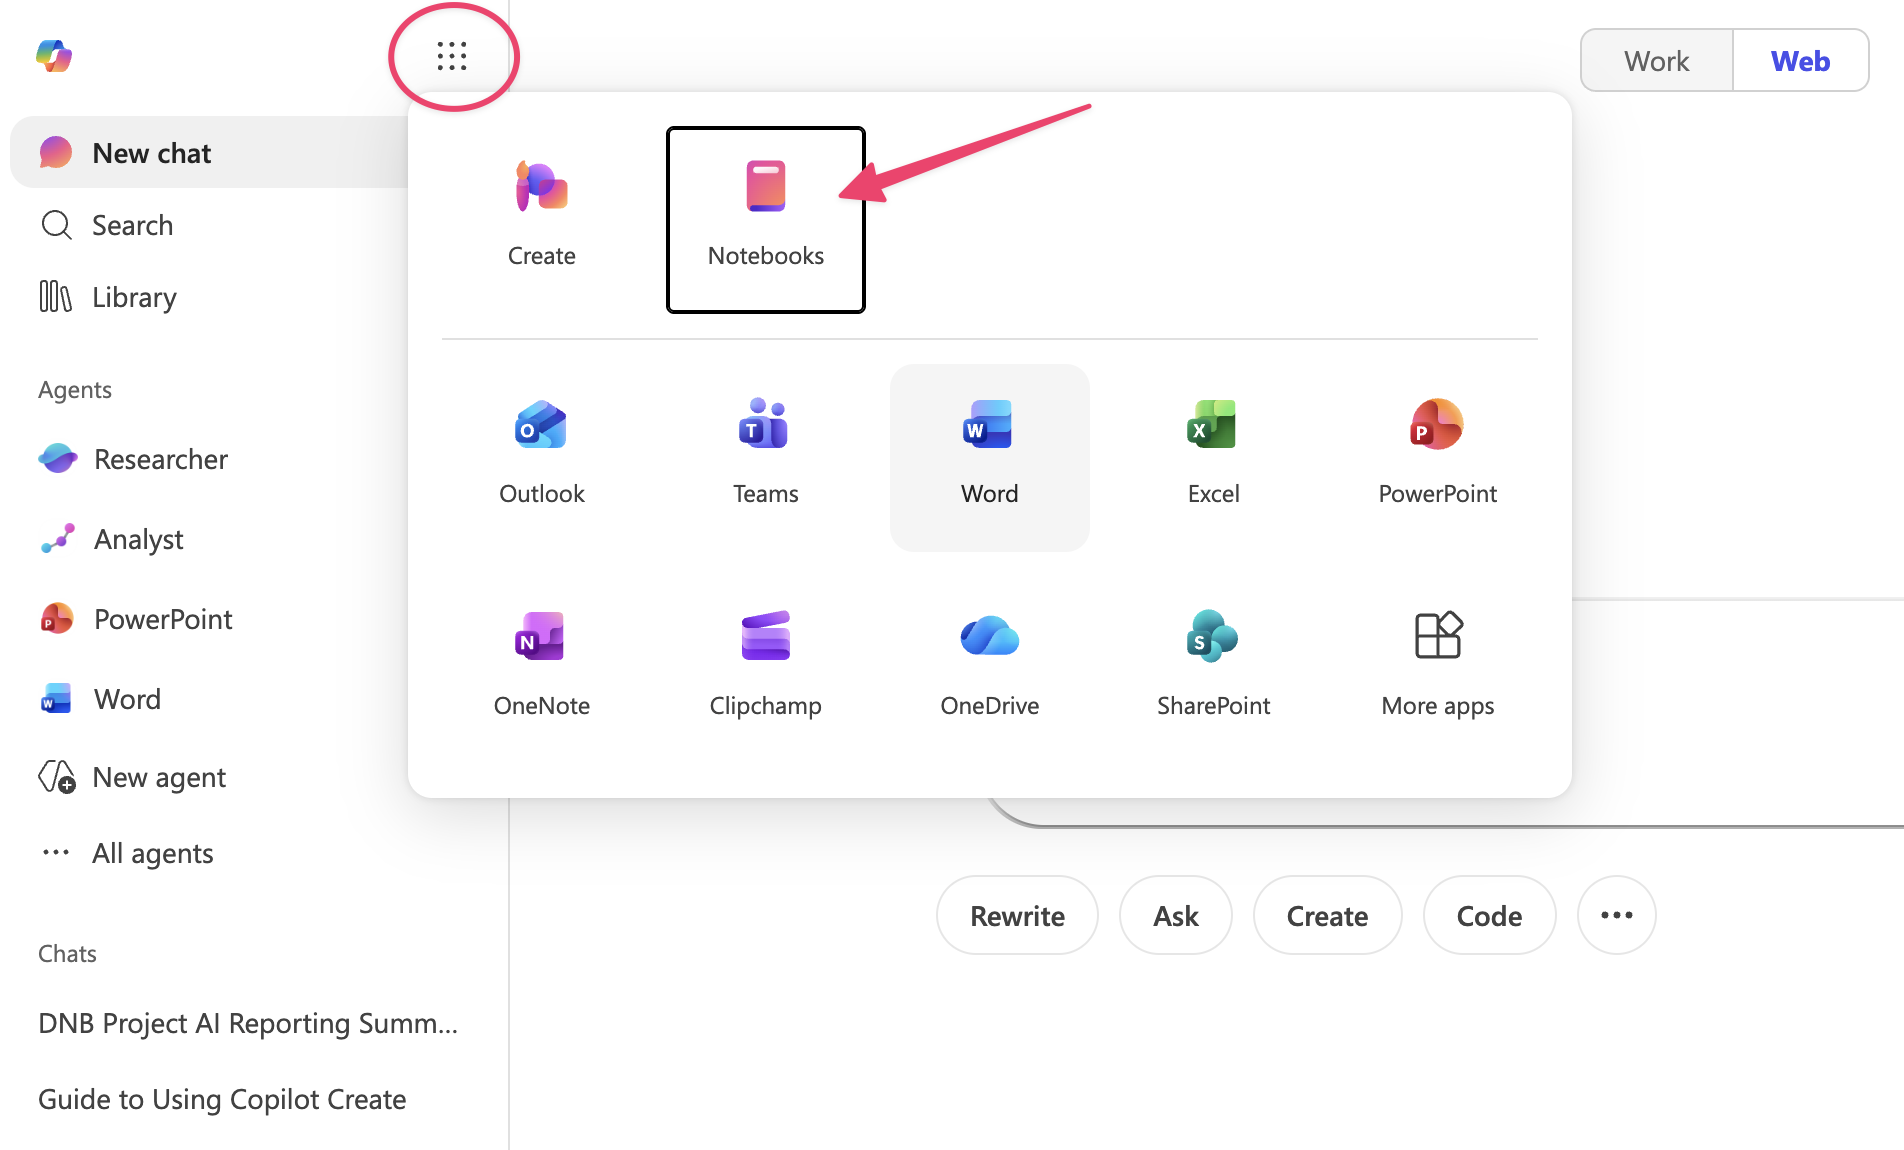
What are the main parts of a notebook?
The notebook interface has three main areas:
1. Left side – where you add and manage sources.
What can you add as sources? Files, links, and other content like emails, Teams meetings, entire SharePoint sites, and regular web pages.
Heads up: what you produce also ends up in the left column (above the sources).
2. Middle area – your production space.
Here you can quickly create Word documents, presentations, audio summaries, mind maps, and more, based on your sources. You click the format you want and Copilot generates a draft for you. Obviously, what you make here shouldn't be treated as a finished deliverable. Think of it as a draft to keep working on.
Want to read the full article?
Sign in or create a free account to continue.
No trial, no credit card, no mandatory newsletter.
 Copilot Notebooks